Settings & Access Control
Application settings, mail configuration, and the role/permission/user model that controls who can do what in Taxi CRM 2026.
The Settings & Access Control area covers how the application is configured and who is allowed
to use it. It groups two concerns: configuration pages (siteSettings.html, mailSettings.html)
and access control pages — the permission matrix (permissionSettings.html) plus the Role and
User masters (roleMaster.html / addRoleMaster.html, userMaster.html / addUserMaster.html).
Every page below is a standard kit page: a delivered <page>.html, a per-page script
under assets/js/pages/, and i18n strings in assets/locales/en/<page>.json.
Settings and mail pages live under pages/settings/; role and user masters live under pages/masters/.
Site Settings (siteSettings.html)
Purpose. A single editable table of general application settings — the catch-all for global, key/value configuration (currency, timezone, branding flags, feature toggles, and similar).
Audience. Administrators configuring the deployment.
Key sections. One panel card, Site Settings, holds a DataTable with these columns:
| Column | Meaning |
|---|---|
| S.No | Row serial number |
| Property | Setting key (read-only label) |
| Property Value | The editable value (inline-edited in place) |
| Category | Grouping label for the setting |
| Status | Active/inactive toggle for the row |
Rows are loaded from the API by pages/settings/siteSettings.js. Editing a value writes back through
the API and raises a success toast; the Status column toggles a setting on or off.
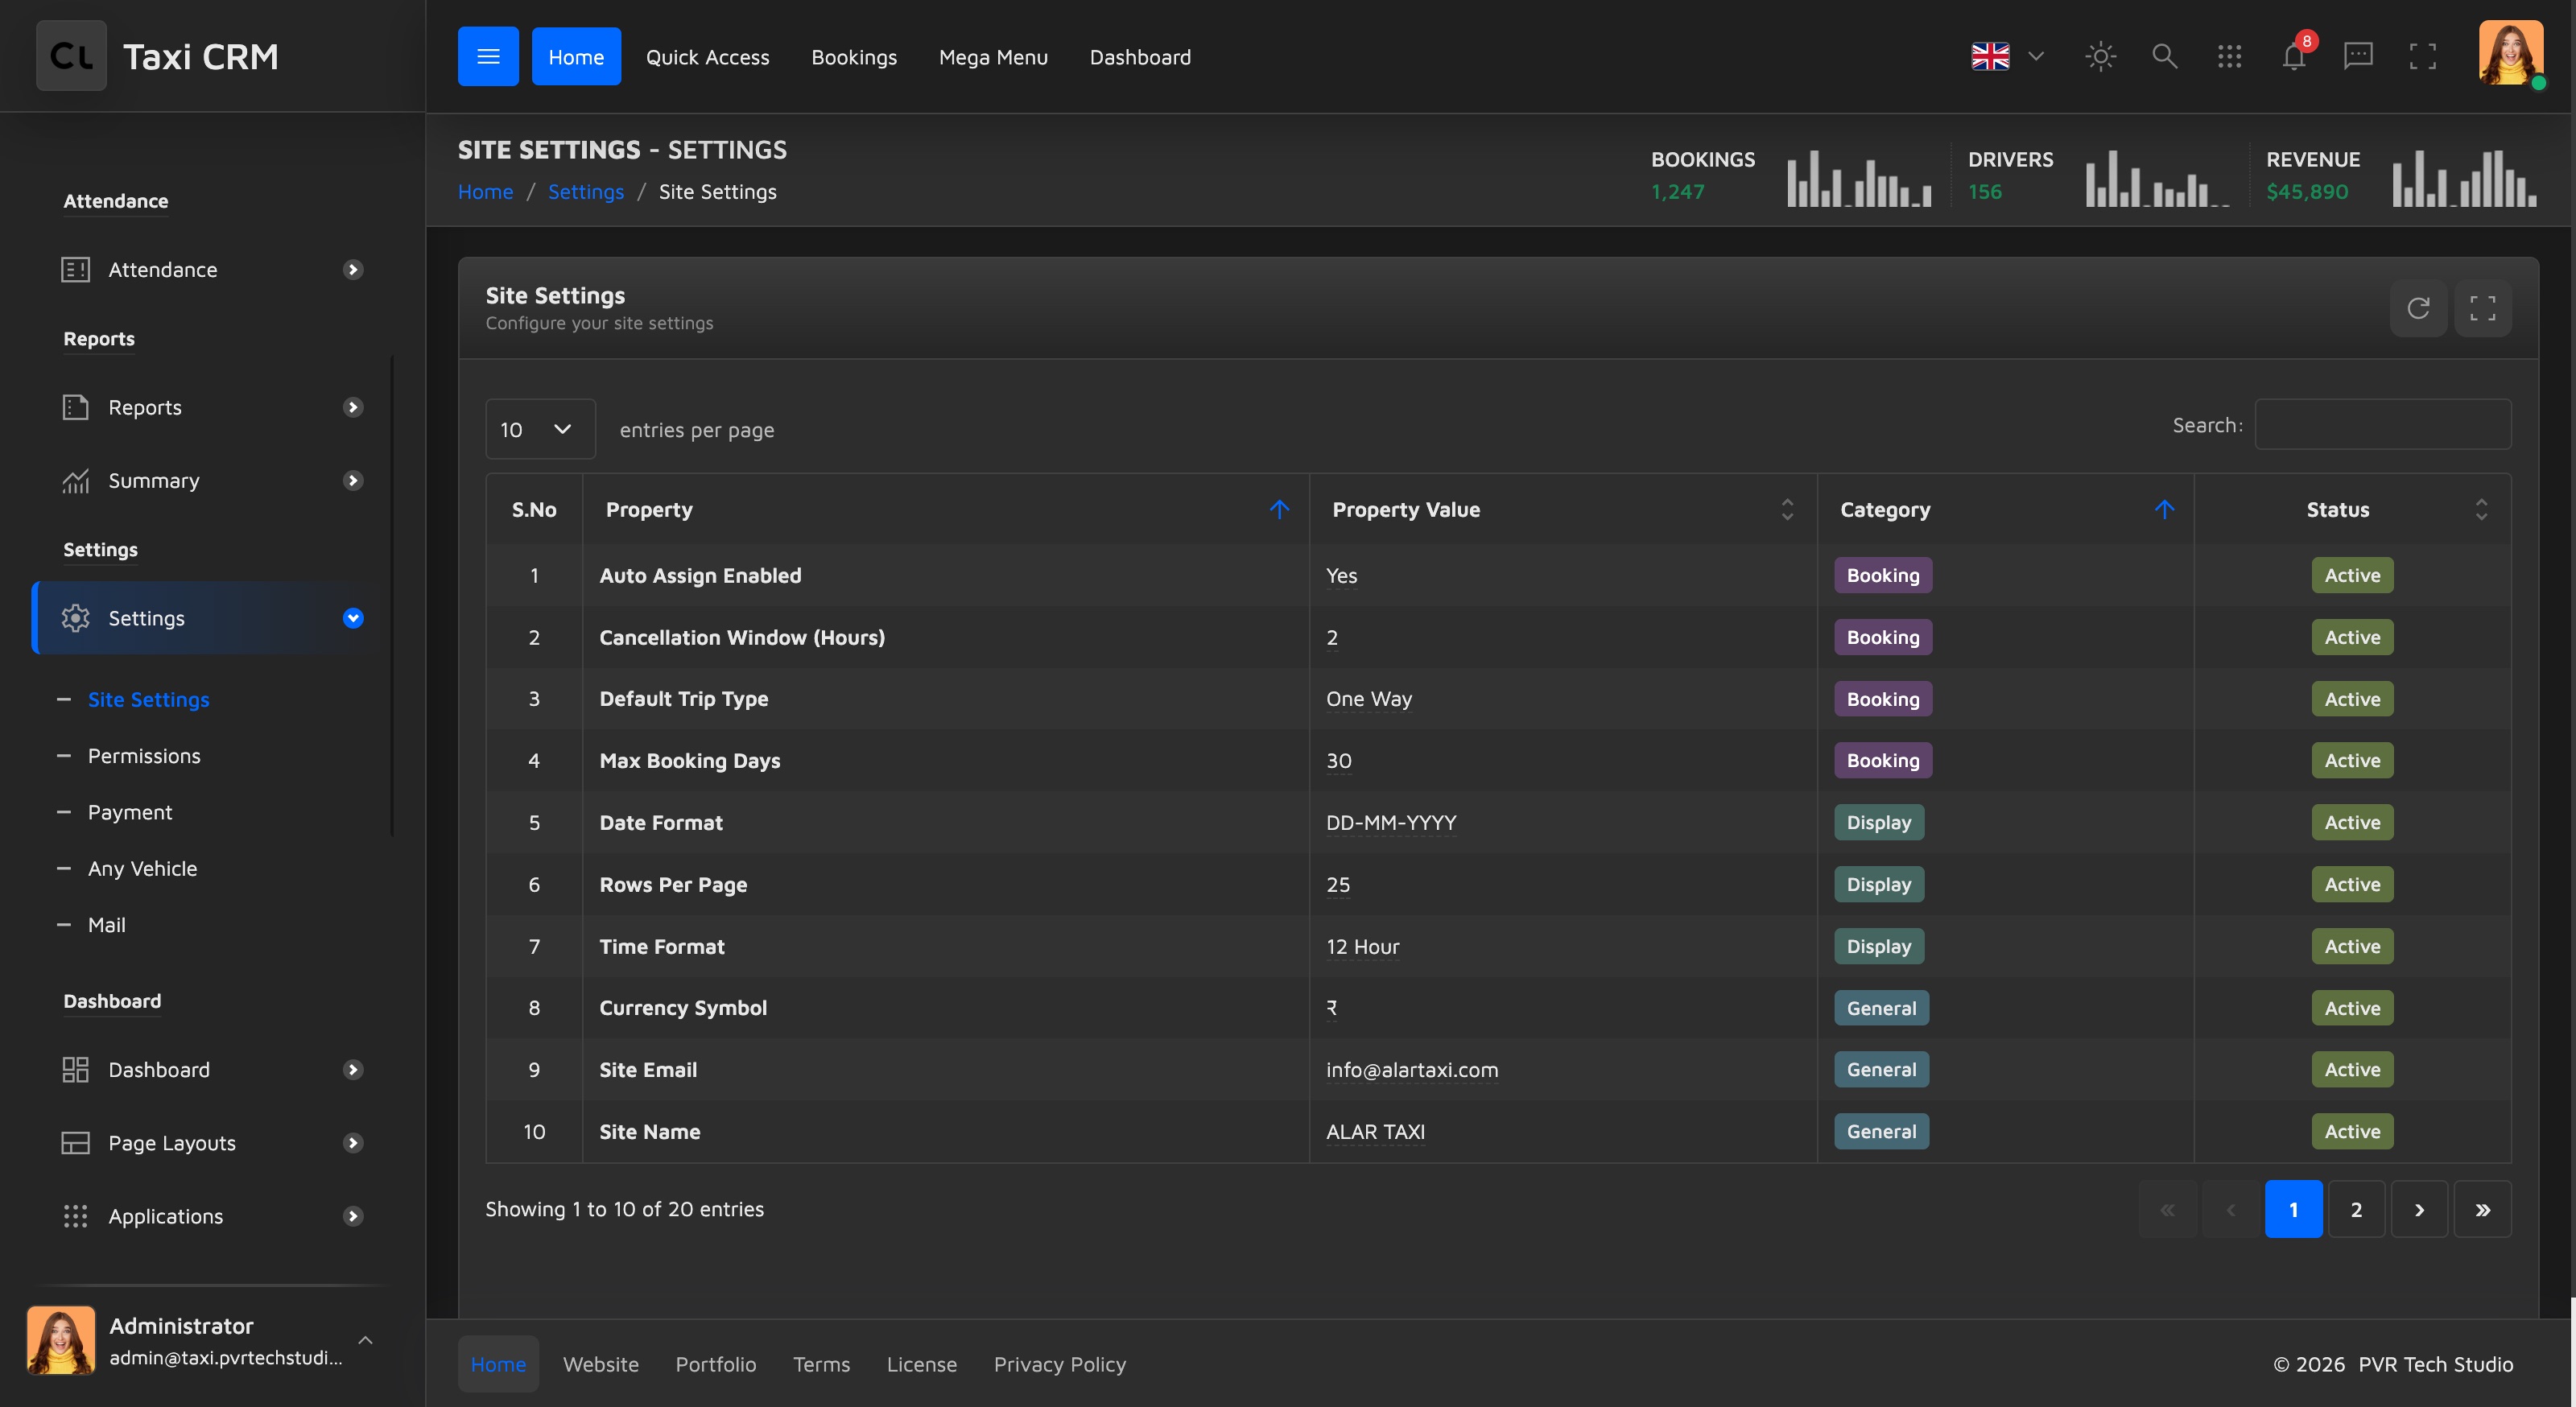
Customize. Add or rename settings by changing the data source the script reads from (see the API
controller it calls) rather than hand-editing the table markup. The table itself is the kit's standard
#initDataTable — see Tables.
Mail Settings (mailSettings.html)
Purpose. Configure the outgoing mail server, the default sender identity, the notification template catalogue, and a test/save workflow.
Audience. Administrators wiring the CRM to an SMTP provider.
Key sections. Four panel cards in an equal-height grid:
- SMTP Configuration (
#smtpConfigForm) — Host, Port, Encryption (TLS / SSL / None), Username, Password (with a show/hide toggle), and an Enable SMTP Authentication switch. - Sender Information (
#senderInfoForm) — From Name, From Email, Reply-To Email, and a multi-line Email Signature. - Email Templates — a list of notification templates (Booking Confirmation, Trip Reminder,
Invoice Email, Password Reset), each with an enable/disable switch and an Edit button. Each row
carries a
data-templatekey. The standalone template editors ship as separatesmEmailTemplate*.htmlpages (Welcome, Order Confirm, Payment, Birthday, Forgot Password, Activate, plus table layouts). - Test & Save — a connection-status banner with a Test button, a Send test email form, and Save Settings / Reset actions.
Customize. Add a template by adding a .template-item row with its own data-template key and
handling it in pages/settings/mailSettings.js. Encryption options and the switches are plain
Bootstrap form controls — see Forms.
Permission Settings (permissionSettings.html)
Purpose. The access-control matrix — pick a role, then toggle that role's permissions per module.
Audience. Administrators defining what each role can do.
Key sections. Two panels side by side:
- Roles (left,
#rolesList) — the selectable list of roles. Selecting a role loads its permissions into the right panel. - Permission Settings (right,
#permissionsList) — one row per module, with a column of toggles: Enable, View, Add, Edit, Delete, Approve, Close. Enable is the master switch for the module; the rest are the per-action grants.
Both lists render shimmer placeholders first, then fill in from the API via
pages/settings/permissionSettings.js.

Customize. The set of action columns is defined in the page header (the
.permission-toggle-header cells) and must stay in sync with the module rows the script builds. Add a
module by extending the API data, not the shimmer markup.
Role Master (roleMaster.html + addRoleMaster.html)
Purpose. Manage the catalogue of roles. roleMaster.html lists roles; addRoleMaster.html is the
create/edit form. This is the coarse-grained companion to the per-module matrix in Permission Settings.
Audience. Administrators who create roles before assigning them to users.
List — roleMaster.html. A DataTable (#initDataTable) with columns: an expand cell, S.No, Role,
Description, Status, Users (count), and Action. Searchable on Role and Description; Status is a select
filter. Script: pages/masters/roleMaster.js.
Add / Edit — addRoleMaster.html. Form #addRoleForm with:
- Role Name and Status (Active / In-Active).
- Description (multi-line).
- A high-level permissions list of toggles: Book, Assign, Edit, Delete, Manage Users, View Reports —
each a
.permissions-itemwith a coloured icon and a switch. - Cancel (returns to
roleMaster.html) and Submit.
Customize. The toggle set here is a quick capability summary; the fine-grained per-module grants
live in Permission Settings. Add a capability by adding a
.permissions-item block (icon colours come from the pale palette — see CSS System)
and handling its name in pages/masters/addRoleMaster.js.
User Master (userMaster.html + addUserMaster.html)
Purpose. Manage system user / driver accounts and their details. userMaster.html lists users;
addUserMaster.html is the create/edit form.
Audience. Administrators provisioning accounts.
List — userMaster.html. A DataTable (#initDataTable) with columns: S.No, Name, Username,
Mobile, Email, Address, Last Pickup, Last Drop, Status, Action. Most text columns are searchable and
Status is a select filter. A hidden multi-criteria search panel (#show_multiple_filter_div) can be
revealed for advanced filtering. Script: pages/masters/userMaster.js.
Add / Edit — addUserMaster.html. Form #addUserForm, grouped into three sections:
- Personal Information — Name, Username, Primary Mobile, Email Address, Status (Active / Inactive).
- Address Information — full Address.
- Last Trip Information — Last Pickup Location with latitude/longitude, and Last Drop Location with latitude/longitude.
Cancel returns to userMaster.html; Submit saves. Script: pages/masters/addUserMaster.js.
Customize. The role a user gets — and therefore what they can do — comes from the Role Master and Permission Settings, not from this form. Extend the form by adding fields inside the relevant section and persisting them in the page script.
Related settings
Some settings pages are documented alongside their feature area rather than here:
- Payment settings (
paymentSettings.html) — see Payments & Billing. - Vehicle settings (
vehicleSettings.html) — see Fleet & Vehicles.
Was this page helpful?